Exercise your brain & enhance creativity with Shelley Holtzman

Exercise your brain & enhance creativity with Shelley Holtzman


Enhance your Creativity with Shelley Holtzman

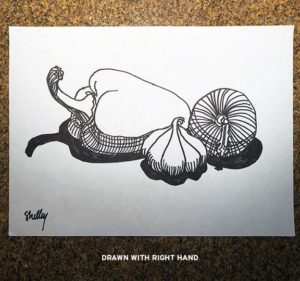
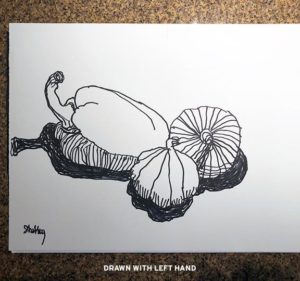
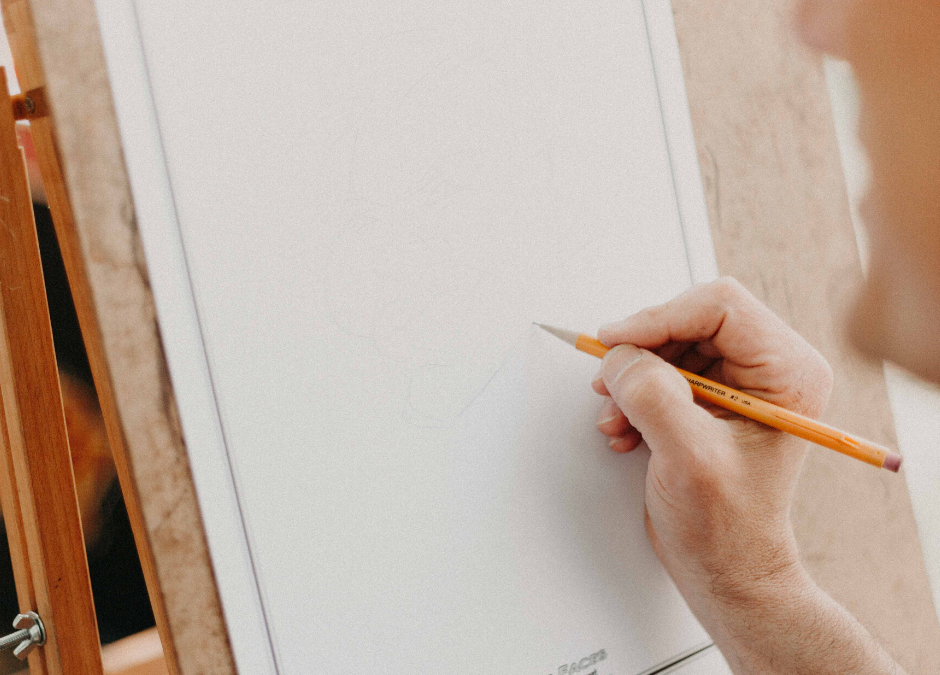
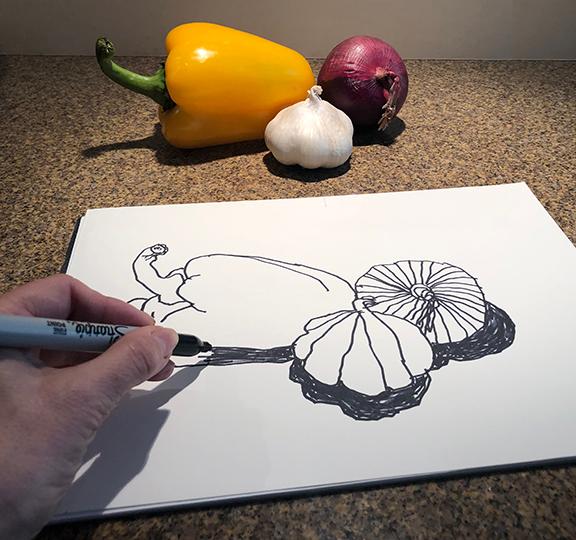
Drawing with your non-dominant hand helps you get to the core of how you process an image.  The act confuses your brain and leads to creativity. 


Using your non-dominant hand forces you to draw what you see rather than what you know. Lowering your expectations for the finished drawing allows you to make interesting marks and breakthrough the predictable. 

It also is a great exercise for improving brain functioning in general!  So what do you have to lose?  Try it!    

_______________________

About Shelley Holzman

Shelley Holzman  Shelley Holtzman is Co-President of The Art Guild and a member of the Port Washington Library Art Advisory Council.  A former art director for a New York ad agency, her experience with graphic design is evidenced in her work, which emphasizes strong lines and vivid contrasts.  Painting in watercolor or oil, her passion for color can be seen in her florals, landscapes and portraits as she strives to illuminate the vibrancy of people and world around us. Shelley’s art can be viewed at ShelleyHoltzman.com 

Shelley is also a designer for Vida, a sustainable socially conscious global company. Her designs can be viewed at shopvida.com/shelley-holtzman


TAG at Home

[catlist name=tag-at-home]

Using a Fill Flash Outdoors with Daniel Kasle

Using a Fill Flash Outdoors with Daniel Kasle

Using a Fill Flash Outdoors

with Daniel Kasle

Many new and indeed some experienced photographers are skittish about using a flash in an outdoor setting.  Maybe it just isn’t intuitive to bring more light to a brightly lit situation but the simple illustration below shows just how useful a little fill flash can be even in bright sunlight.

 All three featured images were taken at 1/200 sec, f4.5 and ISO 64.

 On a bright sunny day, the harshness of the light, especially around midday, can make creating even a simple portrait a real headache.  Should I have my subject facing the sun?  Back to the sun?  Side angle?  As you move around and try each angle, you may just give up after a few shots of each because none of them look just right.  Waiting for a cloud to pass in front of the sun or finding a shady area may be best but sometimes its just not available and, even if it is, the light might be dappled causing light and dark spots across the subject.
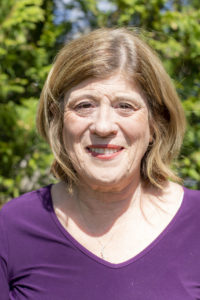
Take for instance image #1 here.  The subject is facing directly into the sun.  First problem is that the harsh light causes parts of her to look blown out (overexposed) while the hard shadows cast uneven light across her face.  Her shirt reflects the sun too, rendering its color to be much less rich than it really is.  Remember the farther away from the light source, the harsher the shadow and the sun is, well, pretty much the farthest light source we have.  Also, any time you have your subject looking directly into the sun, they can’t help but squint and that isn’t going to please them when you show the image.

So, we try turning our subject so that she is backlit by the sun.  Our camera is likely to have a light meter that averages the illumination of a scene and creates an exposure that balances bright and dark areas. 
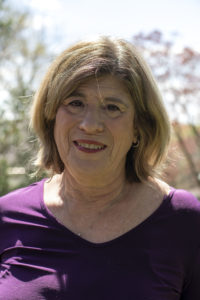
We can see from image #2 here that our subject now is underexposed and the background is overexposed.  Clearly, not a good combination.  One positive effect though is the highlight that the backlighting has on her hair.  In our final product, it would be nice to keep that element in the image.

The solution…

This is where a fill flash comes in handy.  You can use the built-in flash of your camera or a separate Speedlight either mounted on the camera or handheld to the side but the trick here is to add just enough fill to make the image pleasing and well balanced.  Many current digital cameras have very capable automatic shooting modes that will properly incorporate the camera’s built-in flash with a daylight exposure. 

Image #3 was shot on manual mode (I selected the shutter speed, aperture, and ISO) with a Speedlight mounted to the camera.  I took several exposures with the only difference being varying the power of the flash.  If you have a Speedlight, it pays to spend some time learning how it works and how you can adjust it to provide the right light for the image you are trying to capture.

In Image #3, we now have a good balance of light on the subject and in the background.  We retained the very nice backlight effect on her hair and the fill flash added enough even light to her face to eliminate any shadows.  Also, as she is facing away from the sun, her eyes are open and bright.

_______________________

About Daniel Kasle:

  Dan Kasle has been a photography enthusiast for over fifty years.  He enjoys travel photography and portraiture and has studied at International Center of Photography over a number of years.  Dan and his wife Annette have been residents of Port Washington for 38 years and raised two sons here. His work can be viewed at www.danielkaslephotography.com

Instagram  @danielkasle

TAG at Home

[catlist name=tag-at-home]

Making Art out of Memories

Making Art out of Memories

Making Art out of Memories

making art


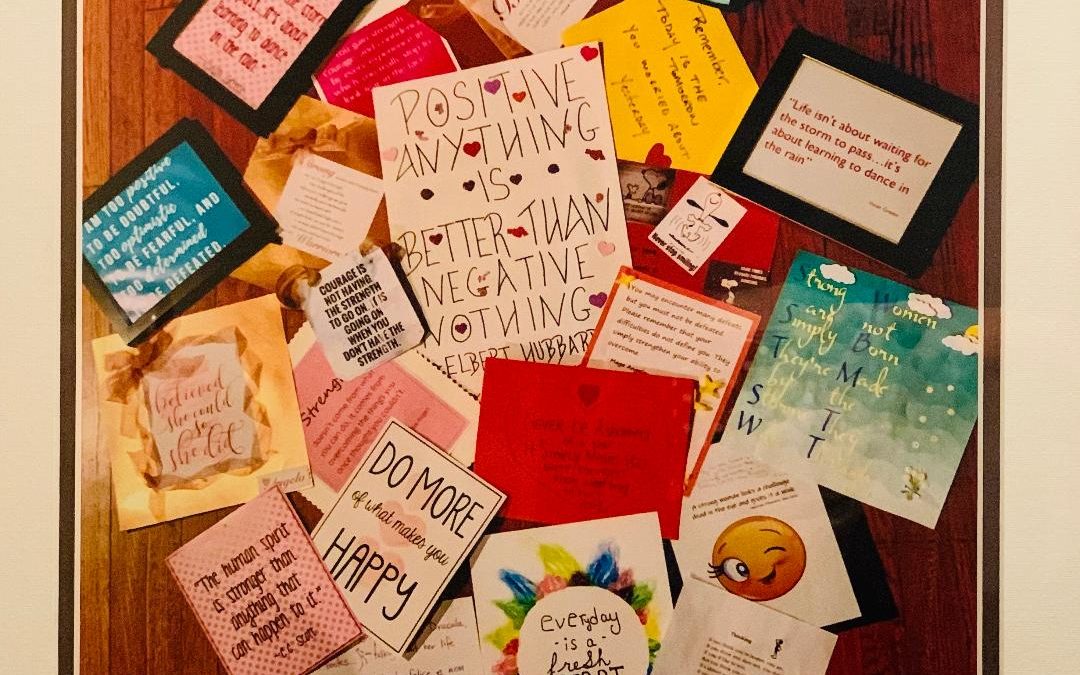
If you’ve been quaran-cleaning then you may have come across boxes of cards, notes or clippings. A simple way to help clear out some paper but retain the memories is by framing them.

This is a simple project that you can do on your own, or enlist the help of family members so you can take a virtual stroll down memory lane.


– Purchase a frame at the store or online

– Group items together by memory or person or topic

– Experiment with placing the items on the frame 

– Glue or tape items to frame backing 

– Replace cover & hang 

 _____________________

Angela Vinciguerra  is the treasurer of The Art Guild.


Creating Color Swatches with Katrina Benson

Creating Color Swatches with Katrina Benson

Katrina Benson, Cherries, Color Swatch, color swatch tips, TAG at home, art class, art tip, art lesson

Creating a Color Swatch from a Reference Photo with Katrina Benson

Painting from a photograph? 

As artists, we can choose how we render what we see. We may want a realistic representation of our reference, or not at all.  Either way, it can be helpful to verify that the colors and values we perceive in our reference are what’s actually there. 

We know that our perception of colors and values isn’t always accurate.  Their appearance will be different, and often misleading, depending on the surrounding colors and values. 


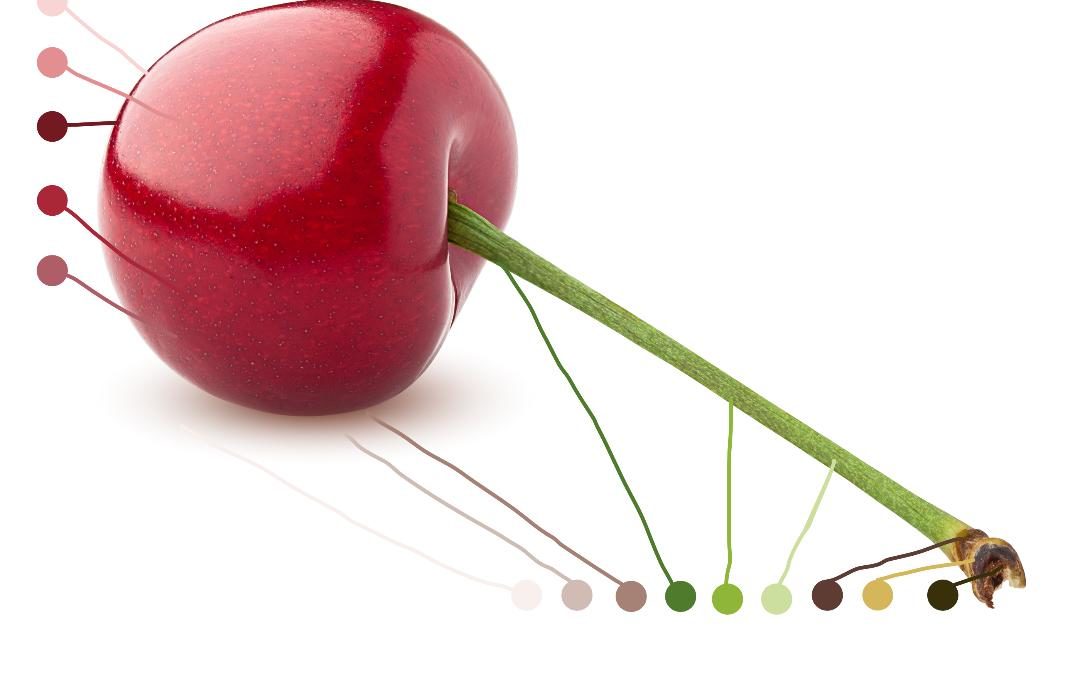
A very simple way to verify colors is to create swatches using a photo app.  This Screencast tutorial shows a quick and simple way to pull color swatches from a photo using a free web-based photo app.  The steps shown are basically the same for all photo editing programs, so the method is transferable to other software such as Photoshop and Affinity Photo.

View the video here: Katrina Benson’s Creating a Color Swatch from Reference Photo

_______________________

About Katrina Benson:

Katrina Benson is the Vice President of the Art Guild and an award-winning artist working primarily in colored pencil and watercolor. Her work gravitates toward realism, although she enjoys all forms of artistic expression and experimentation. Working in realism is an opportunity to explore easily overlooked nuances in the world around me. The process of looking deeply and interpreting with each stroke gives me a profound sense of connection and gratitude for the wonders of even the simplest of objects.”  Find out more about Katrina on her website www.kblfineart.com.

Katrina teaches Colored Pencil: Foundational Techniques

TAG at Home

[catlist name=tag-at-home]

Sketch your Day with Stephanie Navon-Jacobson

Sketch your Day with Stephanie Navon-Jacobson

Sketch Your Day with Stephanie Navon-Jacobson


Use one of these drawing prompts to record something from your day:

Where did I go?

What did I see?

What did I wear?

What did I eat/drink?

What did I use/handle/touch?

What did I buy?

What’s new?

What’s old?

What did I throw out?

What’s the same as usual (a routing or repetitive event??

What’s different than usual (a unique event)?

What’s a random thing that happened?

One this day, what will be a memory?

_______________________

About Stephanie Navon Jacobson:

Stephanie Navon Jacobson, Art Guild, Art Guild teacher, Art Guild instructor  Stephanie Navon-Jacobson As an artist, I am always observing the world around me.Whether floral, landscape, animal, or figure, abstract or realistic, my images always go back to nature. I am first and foremost a printmaker, although I work in other mediums, too. I am a printmaker who paints, rather than a painter who prints.

I was originally attracted to printmaking in college. I loved the studio community aspect as well as the various techniques. I like to experiment with various techniques. The possibilities seem endless. I also like the element of surprise each time you pull a print.

It is so satisfying to work with people who are new to printmaking or to teach experienced artists a new technique and watch their enthusiasm as they ‘get bit by the printmaking bug.’ Printmaking is such a versatile medium. It can stand alone or be incorporated with other mediums such as oil or watercolor. I encourage my students to add printmaking to their artistic arsenal and incorporate it with their other artistic endeavors.


TAG at Home

[catlist name=tag-at-home]

Blind Contour with Marc Isaacs

Blind Contour with Marc Isaacs

Blind Contour Drawing

with Marc Isaacs


Blind contour drawing is the best friend to an artist and it often comes before contour drawing, but not necessarily. It should be repeated daily even by the experienced hand as it is great practice.

 If you have been introduced to contour drawing previously then you have half an understanding, now for the other half…

You may not look at the paper on which you draw and you may draw over and over on the same paper with overlapping being perfectly ok. 

The goal is an exercise, not a finished image. The pencil is your barbell. The only reason to keep the practice papers is to observe progress. The jump can be surprising.

Here we go:

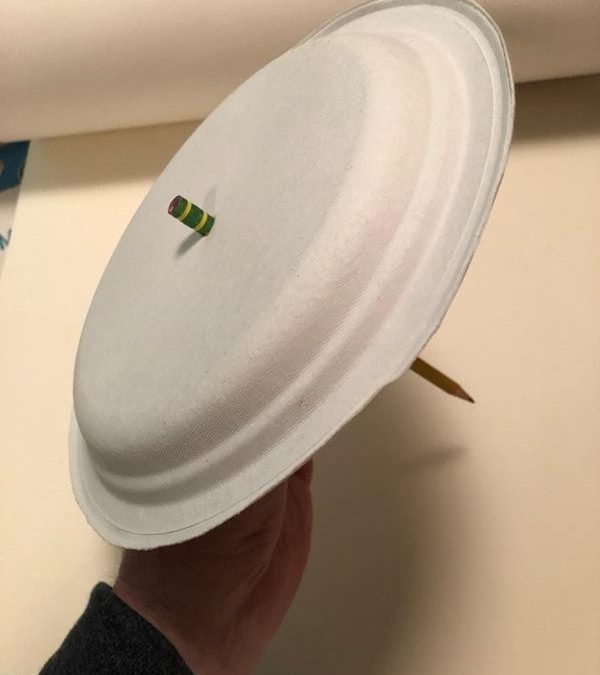
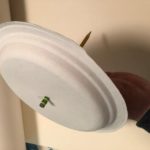
  1. We need an objector model, a pencil and paper and a large paper plate. Poke a hole in the paper plate center and slide the pencil through until it reaches almost to the top of the pencil, near the eraser area. Now the pencil has a hat. 
  2. Look at one side of the object to start, we can see the whole object later. Place the tip of the pencil on the paper. Be sure you cannot see the surface where the mark-making takes place.
  3.  Imagine your eye and the point of the pencil to be in the same spot. Trace the edge of the model as if by an imaginary laser pointer without lifting the pencil. 

It may help if you verbally describe each bit as you go. Saying things like I move the tip downward to a step and I am moving my pencil over it away from the main body, down a little, and back in towards the body, continuing downward … the more descriptive the better as it will slow you down to training speed.

Eventually, you will go silent altogether. The other key point is to remember that although you are some distance away from the object you will guide the pencil as if actually touching it. A fun challenge is to skip the paper plate and honor yourself by not looking at the paper. Toss away the eraser as you won’t need it at all.

 With practice, the eye-hand coordination will grow beyond expectation.

_______________________

About Marc Isaacs:

Marc Isaacs, Art Guild   Marc Isaacs is an award-winning Long Island artist and teacher, with a degree in Art Education and a Masters in Fine Arts. His work is in collections in the US, Taiwan and Japan and periodically in the Metropolitan Museum in New York City as well as Huntington’s Heckscher Museum.  Whether teaching drawing, clay or paint in two dimensions or three, he has a unique teaching philosophy which he calls “solving art.” Students are taught to create links between the dimensions and develop art skills which they can carry across education. He teaches students to work with conventional materials as well as tools and found objects in order to enhance their tactile and environmental awareness. He currently teaches for the Art Guild, YMCA, Friends Academy, and the North Shore school district.

TAG at Home

[catlist name=tag-at-home]