Blind Contour with Marc Isaacs

Blind Contour with Marc Isaacs

Blind Contour Drawing

with Marc Isaacs


Blind contour drawing is the best friend to an artist and it often comes before contour drawing, but not necessarily. It should be repeated daily even by the experienced hand as it is great practice.

 If you have been introduced to contour drawing previously then you have half an understanding, now for the other half…

You may not look at the paper on which you draw and you may draw over and over on the same paper with overlapping being perfectly ok. 

The goal is an exercise, not a finished image. The pencil is your barbell. The only reason to keep the practice papers is to observe progress. The jump can be surprising.

Here we go:

  1. We need an objector model, a pencil and paper and a large paper plate. Poke a hole in the paper plate center and slide the pencil through until it reaches almost to the top of the pencil, near the eraser area. Now the pencil has a hat. 
  2. Look at one side of the object to start, we can see the whole object later. Place the tip of the pencil on the paper. Be sure you cannot see the surface where the mark-making takes place.
  3.  Imagine your eye and the point of the pencil to be in the same spot. Trace the edge of the model as if by an imaginary laser pointer without lifting the pencil. 

It may help if you verbally describe each bit as you go. Saying things like I move the tip downward to a step and I am moving my pencil over it away from the main body, down a little, and back in towards the body, continuing downward … the more descriptive the better as it will slow you down to training speed.

Eventually, you will go silent altogether. The other key point is to remember that although you are some distance away from the object you will guide the pencil as if actually touching it. A fun challenge is to skip the paper plate and honor yourself by not looking at the paper. Toss away the eraser as you won’t need it at all.

 With practice, the eye-hand coordination will grow beyond expectation.

_______________________

About Marc Isaacs:

Marc Isaacs, Art Guild   Marc Isaacs is an award-winning Long Island artist and teacher, with a degree in Art Education and a Masters in Fine Arts. His work is in collections in the US, Taiwan and Japan and periodically in the Metropolitan Museum in New York City as well as Huntington’s Heckscher Museum.  Whether teaching drawing, clay or paint in two dimensions or three, he has a unique teaching philosophy which he calls “solving art.” Students are taught to create links between the dimensions and develop art skills which they can carry across education. He teaches students to work with conventional materials as well as tools and found objects in order to enhance their tactile and environmental awareness. He currently teaches for the Art Guild, YMCA, Friends Academy, and the North Shore school district.

TAG at Home

[catlist name=tag-at-home]

Photographing Art with Steve Silberstein

Photographing Art with Steve Silberstein

Photographing Art

with Steve Silberstein


Follow Steve Silberstein’s step by step instructions for photographing art using an iPhone and Snapseed. Watch the video here 

1. SET UP 

  • Turn on grid lines on camera screen in settings/Camera
  • Turn off Live View on iphones
  • No digital zooming (don’t pinch) – use 1x or 2x camera setting
  • Download “Snapseed” phone photo editor
  • Wear dark colors (you reflect)

2. THE SHOOT

  • Find, diffuse, indirect light, especially for oil paintings
  • Check for reflections
  • Place a piece of white paper in the frame for white balancing later
  • Zoom with your hands, not the screen
  • Square the picture in the frame and gently touch, not HIT, the shutter button

3. POST PROCESSING

  • Use the “white balance” tool in Snapseed and adjust “white balance”
  • Crop
  • Export

4. CHECK FILE SIZE (not included in video)

Many galleries limit the file sizes that can be uploaded. To reduce the size of a photo:

  • Install Compress Images App from App Store
  • Select the image that you wish to compress
  • Select the level of compression
  • Tap on compress images
  • The app will automatically save the images to your camera roll

Don’t forget to change the name of the files to include your name and the title of your work. Enjoy!

_______________________

About Steve Silberstein:

  Steve Silberstein is a New York based photographer focused on portraiture, live entertainment and street photography. He first picked up a camera as a 12 year old and has never put it down, even while raising a family and working in finance. Steve is a member of the Soho Photo Gallery and the Art Guild of Port Washington. His work can be seen @silbersteinphotography on Instagram and www.stevensilberstein.com

TAG at Home

[catlist name=tag-at-home]

Still Life in Colored Pencil with Barbara Silbert

Still Life in Colored Pencil with Barbara Silbert

Still LIfe, drawing, pencil, colored pencil, Art Guild, Barbara Silbert  

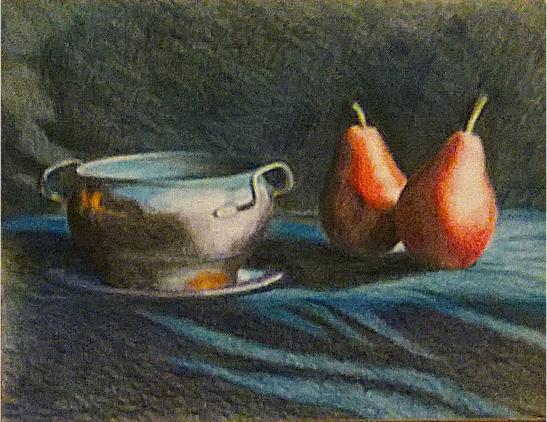
Drawing a Still Life in Colored Pencil
with Barbara Silbert

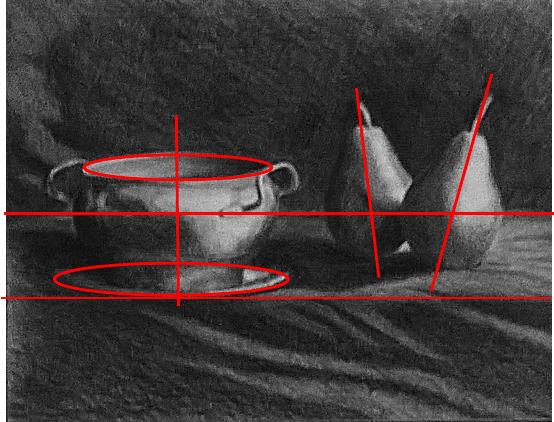
1. SET UP YOUR STILL LIFE (SAME AS LAST SESSION)

Set up your objects on a tablecloth, and find another cloth to prop up behind it & tape to a wall or a large board.

RE-DRAW your still life as before but on a smooth paper like Bristol or a colored pencil pad. Use a med. blue to draw with (Prismacolor best)

Note: don’t color over your pencil drawing with colored pencils – it won’t work. 

2. SHADING

Begin by lightly shading the blue cloth first, using the side of your sharpened colored pencil and try to get an even tone. Then add the medium blue and then midnight blue shadows. 

Start shading the pears by using a light coral for the highlights, leaving some white of the paper. Then use a red-orange for the mid-tones, and add some dark umber (brown) to the red for the left side that’s in shadow. 

3. COLOR

Put the stems in with a yellow green, noting the light side of stem on right, and make a bit darker on top and left side. 

For the tarnished copper bowl, use a light blue for the inside, noting how it gets darker on the inside right. Add some orange where indicated, then dark gray around it and mesh one color into another softly with your pencil point. You cannot blend colored pencil with your finger or a paper stub. Remember to leave white highlights where you see them.

4. BACKGROUND & SHADOW

Finish the dark background with the darkest blue, adding only a bit of black, and perhaps some dark red as well. 

Don’t forget shadows under the bowl and pears, and note how beautiful the pears look against a dark background!

Happy Drawing, Barbara 

_______________________

About Barbara Silbert:

  Barbara Silbert’s work has been acknowledged with more than 50 awards in various venues. She has taught Pastel Portraiture at the Nassau County Museum of Art and is presently teaching at The Art Guild and Great Neck’s school of Community Education at Cumberland. Silbert has taught adults, children, teens and seniors locally for the past 15 years. 

“Passing along what I have learned gives me the greatest pleasure of all.”

TAG at Home

[catlist name=tag-at-home]

More Nose Knowledge with Rob Silverman

More Nose Knowledge with Rob Silverman

nose, nose tips, portrait, portraiture, portraiture tips, TAG at home, The Art Guild  

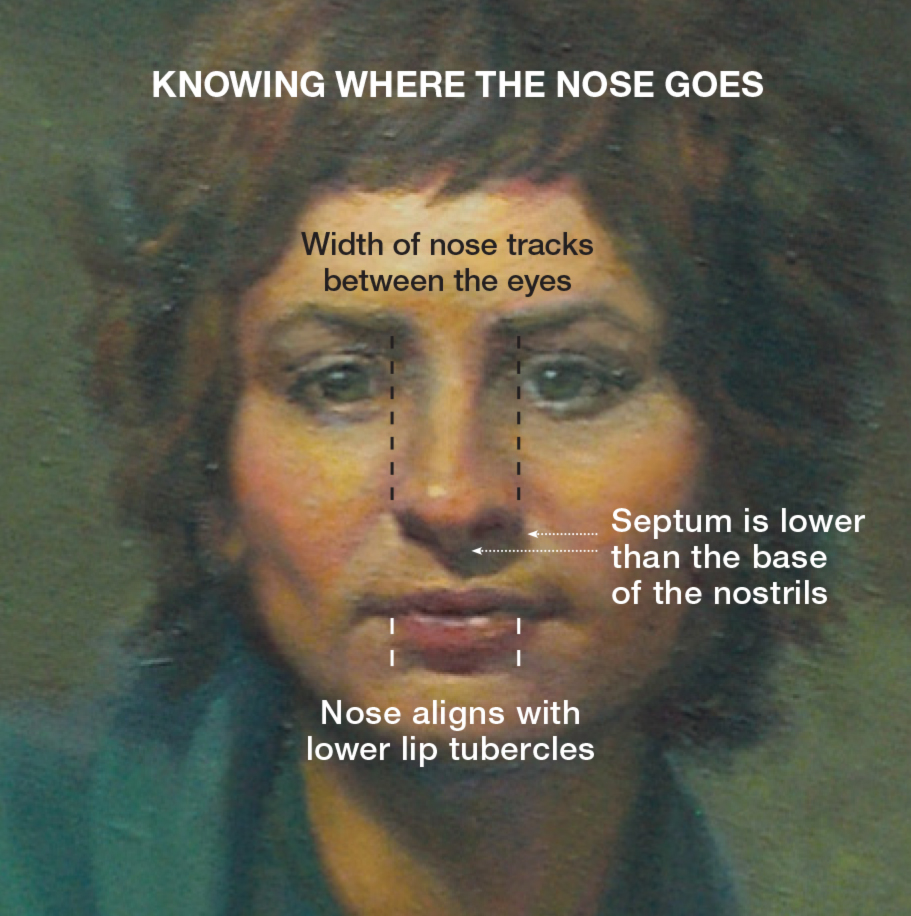
More Nose Knowledge
with Rob Silverman

1. NASAL BONE

The end of the nasal bone creates a slight bump in the bridge of the nose

2. PROFILE

In profile the nose is half on the face, and half off

3. SHADOW

Minimize the contrast between the nostrils and the shadow plane of the lower portion of the nose, so that the nostrils don’t appear as punched holes

_______________________

About Rob Silverman:

Rob Silverman’s innovative techniques have been featured in American Artist Workshop Magazine and The Art of the Portrait, the official publication of the Portrait Society of America. His work has appeared at Crosby Street Gallery and Spring Studio Gallery in Soho, the Art League of Long Island, Edward Hopper House, The Art Guild of Port Washington, The National Art League, the Lockwood-Mathews Museum, as well as the National Arts Club and Salmagundi Club. View his work at silvermanportraits.com

Rob teaches New Strategies & Techniques in Portraiture at The Art Guild on Mondays.

TAG at Home

[catlist name=tag-at-home]

Get Happy with these Prompts

Get Happy with these Prompts

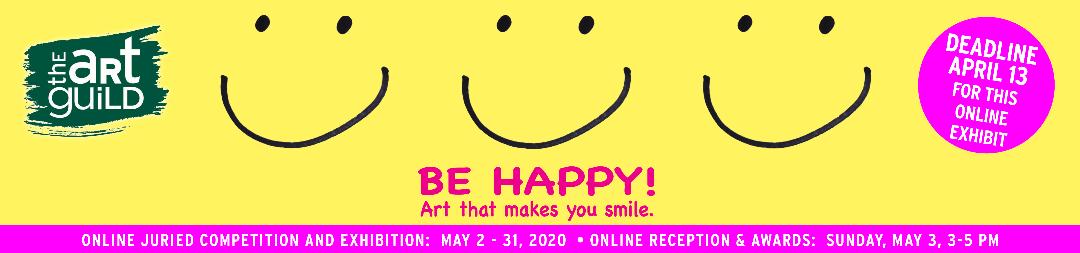
Prompts inspired by BE HAPPY! Art that makes you smile

Show us what you are grateful for, inspires you, lifts your soul, and makes you smile.

Health

Everyday items

Color

Memories

Rainbows

Sunsets

Solitude

Nature

Family

New traditions

Music

Animals

Prayer

Want to enter the competition? CLICK HERE for more information. 

BE HAPPY Awards $300 f(1st place), $200 (2nd place), $100 (3rd place)

_______________________

About The Art Guild:

The Art Guild offers classes and workshops for children and adults year-round. The gallery was voted Best Art School in 2018 and 2019 and Best Art Gallery 2017, 2018 and 2019 in Blank Slate Media’s annual competition. The Art Guild of Port Washington, Inc. is conveniently located at ElderfieldsPreserve, 200 Port Washington Blvd., Manhasset, New York. The Art Guild is a 501(c)3 nonprofit organization providing encouragement, education and a forum for the appreciation of the visual arts. 

TAG at Home

[catlist name=tag-at-home]